
Best Paint for Indoor Stairs: Treads, Risers, Railings and Basement Steps
The absolute best paint for indoor stairs is a tough-as-nails porch-and-floor enamel or a newer acrylic-alkyd hybrid paint. We can’t stress this enough: standard wall paint will look terrible in a matter of weeks. You need a formula specifically built to handle constant foot traffic if you want the finish to last.
Painting stairs in Westminster, CO? I PAINT STUFF handles interior painting in Westminster, including stair treads, risers, spindles and railings. Request a free estimate or call (720) 263-7210.
Choosing the Right Paint for High-Traffic Stairs
Consider how much your staircase undergoes daily. It’s more than a mere way to move between floors; it’s basically a high impact area. While children run up excitedly to their bedrooms or pets dash downstairs for meals, the paint of your stairs should be of the highest durability. For this exact reason, using a can of leftover wall paint is a disaster in the making.
Without realizing it, your stairs will be chipping, scuffing and peeling almost immediately.
The secret to a beautiful painted staircase that actually holds up is choosing a product engineered for this exact, demanding job. Your paint choice directly affects not only how your stairs look but also their durability and safety for years to come.
Comparing Top Paint Types for Indoor Stairs
When you’re standing in the paint aisle, the options can feel overwhelming. To make it easier, here’s a quick breakdown of the products we recommend most often for stair projects.
|
Paint Type |
Key Benefit |
Best For |
Considerations |
|
Porch & Floor Enamel |
Superior scuff and scratch resistance. |
High-traffic stair treads and landings. |
Can have stronger fumes during application; requires good ventilation. |
|
Acrylic-Alkyd Hybrid |
Combines oil-paint durability with water-based cleanup. |
Homeowners who want a tough finish without the hassle of oil-based paints. |
Often a bit pricier, but the performance is worth it. |
|
Epoxy Floor Paint |
Extremely hard, chemical-resistant finish. |
Concrete basement stairs or utility stairwells needing maximum protection. |
Can be more complex to apply and may require a separate primer/topcoat. |
|
Chalk Paint (with Sealer) |
Creates a unique matte, vintage look. |
Risers or decorative elements; not ideal for treads without a very durable topcoat. |
Requires multiple coats of a tough sealer (like polyurethane) to be durable enough for stairs. |
Ultimately, for most residential wooden staircases, a quality porch and floor enamel or an acrylic-alkyd hybrid will give you the professional-grade results you’re looking for.
Key Paint Types to Consider
Let’s dive a little deeper into the top contenders. Porch and floor enamels are the classic, time-tested choice. These formulas, whether oil-based or acrylic, are designed to cure into a hard, resilient shell that’s highly abrasion-resistant.
What we usually advise is the acrylic-alkyd hybrid paint, which is more up-to-date. This kind of paint, in fact, offers you most of the benefits that each one has separately: you can clean up with just soap and water as it is a water-based acrylic, but the finish is hard and smooth like that of a traditional oil-based alkyd. We are crazy about these hybrids for stairs as they very nicely smooth out, thus reducing the appearance of brush marks, and they are also very resistant to cleaning.
As home design continues to evolve, even functional features like staircases are getting more attention. In fact, the indoor staircases market was valued at USD 6.5 billion in 2023 and is projected to keep growing.
Pro Tip: When choosing a stair paint, think about it the same way you would the most durable hardwood floor finishes for high-traffic areas. The core principles of durability and resilience are identical; it has to withstand being walked on.
The Impact of Paint Sheen
The paint’s sheen, or finish, is about more than just looks; it’s a crucial part of the performance equation.
- Satin: This is a fantastic middle-ground. It has a subtle luster that helps hide minor dings and imperfections on the wood. It’s also quite easy to clean, making it a popular, well-balanced choice for both the tread you walk on and the vertical risers.
- Semi-Gloss: Semi-gloss has a longer-lasting finish which can be kept immaculate with a simple wiping. Choosing this could be just right for risers and banisters since they are often the targets of scuffs and fingerprints. One should bear in mind, though, that a high gloss finish can make the surface a bit more slippery, so the safety dimension of the treads has to be considered.
Choosing the right finish is just as crucial for other busy parts of your home. If you plan to redo one of the heavily used areas, then our article on the best paint finish for kitchen cabinets will provide you with professional tips on how to achieve a durable and great-looking result.
Mastering the Prep Work for a Flawless Finish
The number of times we have witnesses a gorgeous paint job going down the drain simply due to fast-prep work is innumerable. In the same way that a lovely house depends on a strong foundation, a flawless finish completely depends on surface preparation.
If these steps are skipped, surface peeling and chipping will be the fastest ways for you to find your stairway only a few months. Stairs undergo so much wear and tear that over the years they get dirty, covered with hand oils, and residues from cleaning products. So, before you even think of painting, you have to remove all this dirt.
Cleaning and Degreasing the Surfaces
Your first real task is a deep clean. Grab a good degreasing cleaner (a TSP substitute works well) and mix it with warm water according to the label directions. Then, with a scrub sponge, get to work washing every single surface you plan to paint, treads, risers, and the banister.
You’ll want to pay extra attention to the handrail and newel posts. These spots are magnets for body oils. Once you’re done scrubbing, rinse everything thoroughly with a clean, damp cloth to remove any residue. Let it all dry completely.
We once had a client whose stair paint was peeling off in huge sheets. It turns out, years of furniture polish on the banister had never been properly removed. A simple degreasing step would have saved them a massive headache and the cost of a do-over.
Sanding for Maximum Paint Adhesion
After cleaning and drying the stairs thoroughly, the next step is sanding. It is really not open for discussion that you must do it. Sanding produces a somewhat rough surface, or, in other words, a “tooth, ” which provides the new primer and paint with a good hold. In case your stairs have any kind of shine or gloss, you have to sand them down.
We recommend using 120- to 150-grit sandpaper for this. You’re not trying to strip the wood bare, just scuff up the surface until it’s dull. Afterward, a shop vac is your best friend for sucking up all the dust. For a perfectly clean surface, finish up by wiping everything down with a tack cloth.
If you’re tackling more than just the stairs, our guide to preparing a house for painting has a ton of other useful tips.
Repairing Imperfections
Now that the surface is prepped, every little nick, gouge, and crack will be glaringly obvious. This is your chance to make them disappear.
If some holes or dents need to be fixed, then a good, stainable wood filler will work quite well. You will have to take your putty knife and apply the filler so that the damaged area is slightly overfilled. After it has fully dried, you should use sandpaper to level it up until it is a perfect match to the wood.
On the other hand, to fill small spaces, for instance, where the treads meet the risers or the stair is placed near the wall, spread a thin, smooth line of paintable caulk. This tiny step can be the trick of producing those incredibly sharp, perfectly clean lines that are the hallmark of a professional finish.
Priming: The Foundation for Your Paint
The final step before the fun begins is priming. The primer you choose is critical and really depends on what you’re starting with.
- For bare, unpainted wood: You need a stain-blocking primer. Oil-based primers are fantastic here because they seal the wood grain and stop natural tannins from bleeding through and staining your paint.
- For previously painted surfaces: Your best bet is a high-quality bonding primer. These are specifically designed to stick to slick or glossy surfaces, giving your new paint a solid foundation to grab onto.
Use the correct primer and apply one thin, uniform coat of it. After that, leave it to dry following the manufacturer’s directions. Adequately priming a staircase ensures that you will get a perfect finish that endures for a long time as a result of all your efforts.
Pro Techniques for Painting Treads, Risers, and Banisters
Now that the preparation work is all done, we are ready to get down to the real business of painting. The trick to a staircase that looks like a professional job is not a secret or some mystical gadget; it’s really only about having a clever, well-planned way of doing things.
Our first thing is always to paint the highest level first. This very basic rule will stop us from getting drips, dust, and other small bits falling down and spoiling the surfaces that have just been painted and are below us.
That means we start with the banister, then tackle the risers, and finally, finish up with the treads you walk on every day. This workflow just makes sense. It keeps the project clean and efficient, letting you handle the finicky parts like spindles before you lay down those beautiful, smooth coats on the larger surfaces. Here’s the essential prep sequence we never, ever skip on a job.
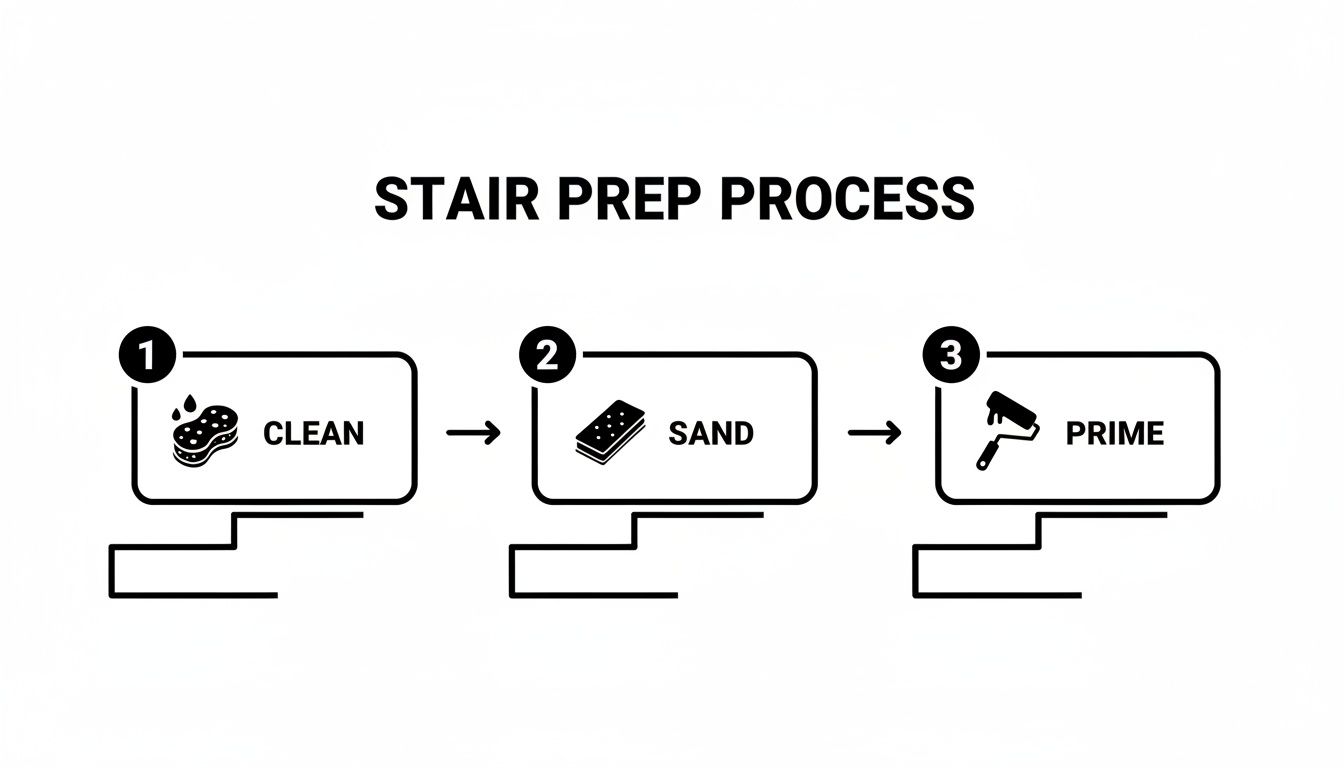
Trust me on this—following that clean, sand, and prime process is completely non-negotiable if you want the paint to stick and stand up to years of use.
Mastering the Banister and Spindles
The banister, newel posts, and spindles are easily the most detailed and time-consuming parts of any staircase. If you rush this part, it shows.
We always start by “cutting in” all the edges, corners, and tight spots with a high-quality 1.5-inch angled brush. A good brush like this gives you the control you need to get crisp, clean lines without slopping paint onto the walls or the treads below.
For the spindles, the virtue of patience is paramount. An angled brush can be used along with a small foam roller separately or together in order to apply thin and even coats of paint. The main idea here is to steer clear of drips and unsightly buildup in the intricate curves and corners.
Pro Tip: Keep a clean, damp rag in your back pocket. If a drip forms on a spindle or you smudge the wall, you can wipe it away immediately. Wait until the paint starts to set, and that tiny mistake becomes a much bigger headache to fix.
This attention to detail is not merely a professional habit; rather, it reflects the fact that more and more homeowners want to integrate such architectural elements into their dwellings. The worldwide market for staircase components such as banisters and spindles was worth around USD 2.5 billion in 2023 and is projected to reach USD 4.0 billion by 2031. It just goes to show how much a beautifully finished staircase matters. You can dig into this growing trend over at Verified Market Research.
Painting Risers and Treads with a Smart Strategy
Once the banister and spindles are looking sharp, you can shift your focus to the risers and treads.
For larger, flatter areas, a 4-inch mini roller with a low-pile (1/4″) or foam cover is just the right instrument to get the job done. It applies a flawlessly smooth coat without any brush marks which typically reveal the work was done by a DIYer. However, before rolling, take your angled brush and carefully paint the areas where the riser meets the tread and along the wall.
So, how do you paint your stairs without trapping everyone upstairs (or downstairs)? This is one of the biggest practical hurdles, but our go-to strategy solves it every time:
- Paint every other step. Starting at the very top, paint the tread and riser for the first step. Then, skip the second step completely and paint the third, fifth, seventh, and so on, all the way down.
- Let them dry completely. Give the painted steps plenty of time to cure. Check the paint can for specific instructions, but plan for at least 24 hours.
- Paint the remaining steps. Once that first batch of steps is dry enough for light foot traffic (again, the can is your guide), you can go back and paint all the steps you skipped.
This method does stretch the project timeline a bit, but it saves you and your family a massive headache. You’ll still be able to get up and down the stairs without navigating a minefield of wet paint. The skills needed for sharp lines here are the same ones you’d use elsewhere in your home; you can learn more in our guide to painting baseboards and trim. It always comes down to thin, even coats and respecting the dry time.
How to Make Your Painted Stairs Safe and Durable
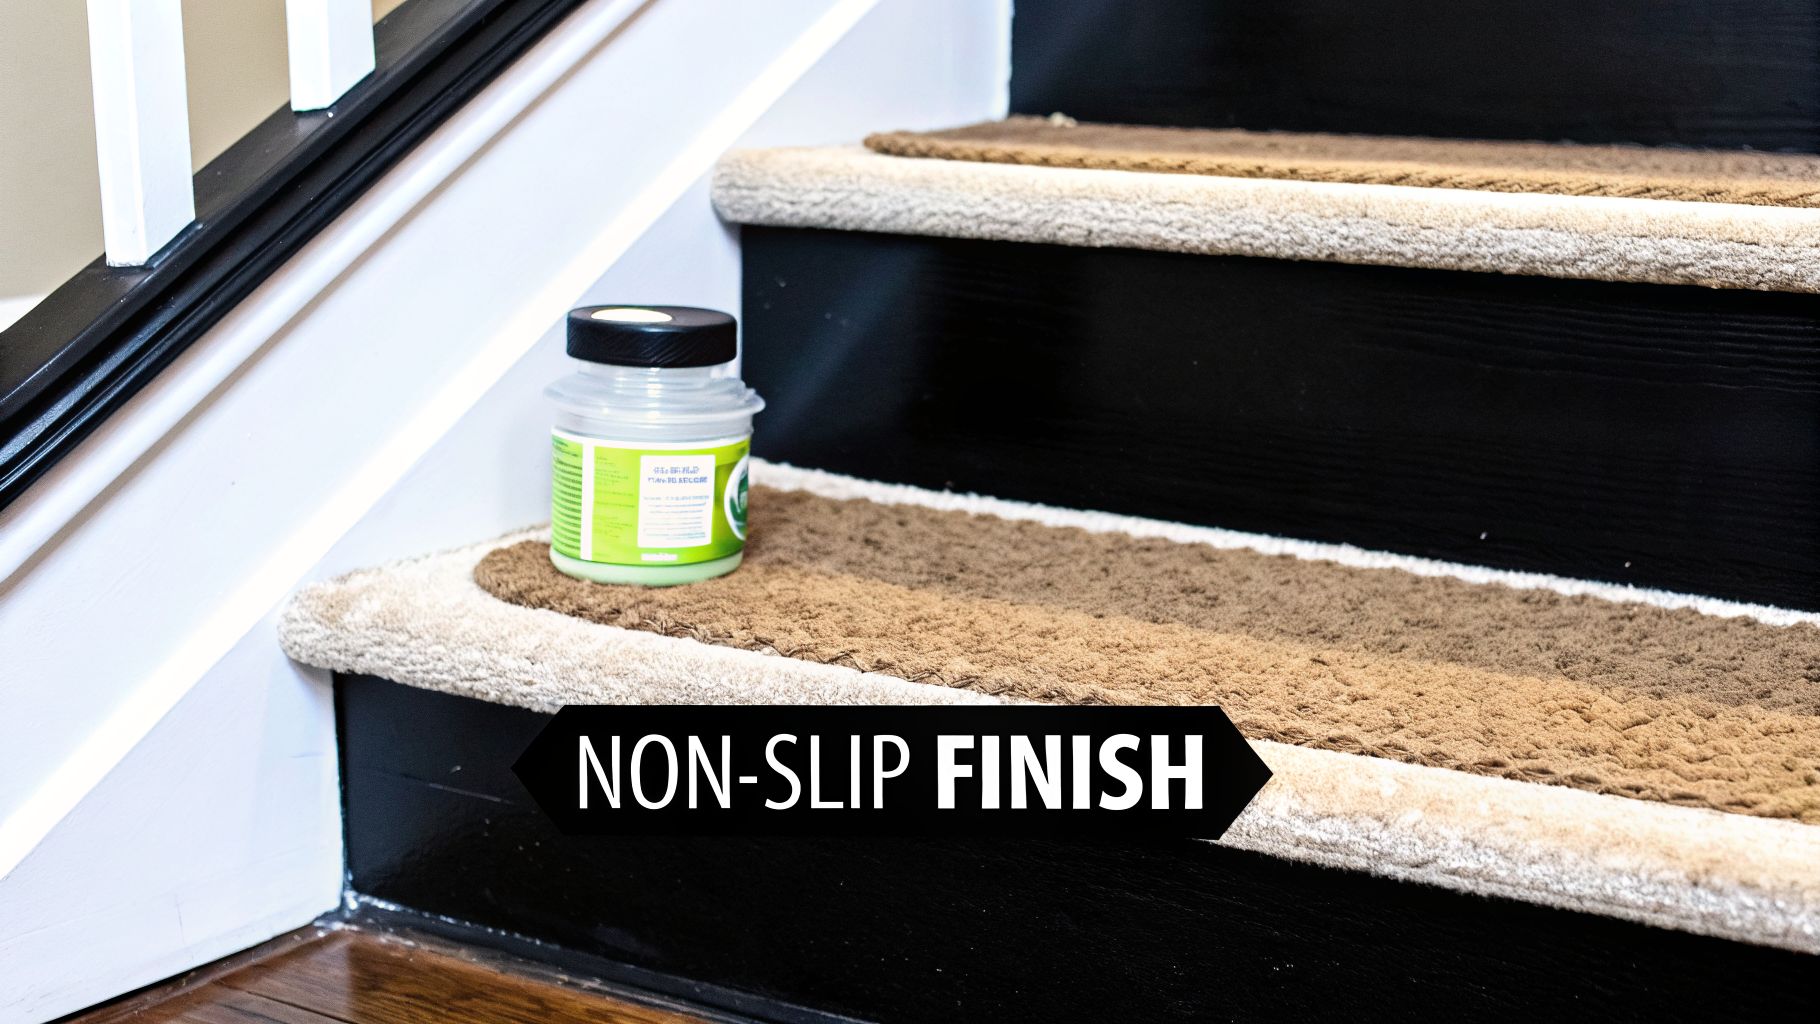
It is great to have a newly painted staircase that looks stunning, but the attractiveness of a finish is wasted if the stairs are unsafe. In fact, certain extremely durable, high-gloss paints can even make the stairs very slippery, posing a danger.
Picking paint that has a good grip for indoor stairs is equally important with choosing the correct color. You should aim to make a surface that is durable enough for everyday use and safe for walking as well. A safe staircase doesn’t have to be a compromise between a beautiful design and.
Adding Grip Without Ruining the Look
The simplest method to reduce the slipperiness of your stairs is by incorporating some texture directly into the paint. A non-slip additive, which is essentially a very fine grit, can be found, and you mix it with the last topcoat that you are applying to the treads. It is a no-fuss solution that produces amazing results. While doing it, always remember to keep stirring the paint to make sure that the grit remains evenly spread.
What if you’ve already painted and don’t want to re-do a color coat? No problem. A clear anti-slip coating is the perfect solution. It works just like a clear varnish, but it dries with a subtle texture that adds grip without changing the color you so carefully chose. Also, you can choose cabinet painting companies nearby for better results.
If additives aren’t your style, you have other great options:
- Stair Runners: A classic choice for a reason. A carpet runner not only provides fantastic traction but also adds a pop of color, pattern, and warmth, completely changing the feel of your space.
- Adhesive Treads: For a more modern and minimal approach, clear or colored adhesive treads are a great pick. They are incredibly easy to stick on and can be replaced down the road if they start to show wear.
A protective topcoat is non-negotiable for a painted staircase. Doing a bit of research on products like the best polyurethane for hardwood floors will give you an idea of what’s out there to give your stairs a truly tough, wear-resistant finish.
Don’t Confuse “Dry” with “Cured”
This is probably the single biggest mistake people make after painting their stairs: using them way too soon. It’s so important to understand that there’s a massive difference between paint that’s dry and paint that’s fully cured.
Dry time is when the paint feels dry to the touch, which can happen in just a few hours. That’s just the surface liquid evaporating.
Cure time is how long it takes for the paint to fully harden and reach its maximum durability. This is a chemical process that can take anywhere from 7 to 30 days.
Jumping the gun is a surefire recipe for nicks, scuffs, and peeling paint. As a rule of thumb, we tell our clients they can use the stairs with socks only after about 48 hours. Hold off on shoes, pets with claws, and definitely don’t even think about moving furniture for at least one full week. A little patience now pays off big time with a finish that looks great for years. For more on this, check out our tricks for long-lasting paint finishes.
Paint Products Painters Use on Interior Stairs
Product names matter because the label decides how the finish wears. These are well-known lines professionals reach for on stairs. Always check the can for the surface, recoat time and cure time before you buy, since formulas change.
- Treads: A dedicated floor paint, such as Benjamin Moore Floor & Patio, Sherwin-Williams Porch & Floor Enamel or Behr Porch & Patio Floor Paint. These are made for foot traffic, which wall paint isn’t.
- Risers and stringers: A scuff-resistant interior enamel in satin or semi-gloss. Risers get kicked, so washability matters more than a flat look.
- Railings, spindles and trim: A waterborne alkyd or enamel trim paint, such as Benjamin Moore Advance, which levels out smoothly and hardens to a tough finish.
No product fixes poor prep. A scuffed, glossy or dusty tread will peel under any of these, so sand, clean and prime first.
Best Paint for Basement Stairs and Interior Wood Steps
Wood steps inside the house, whether on a main staircase or down to the basement, take the same abuse: shoes, grit and constant friction. The best paint for interior wood stairs is the same porch-and-floor enamel or acrylic-alkyd hybrid described above, applied over a bonding primer and given a full cure before heavy use.
- Basement stairs: Concrete or unfinished wood steps in a basement see more moisture and dust. Clean and degrease thoroughly, let the surface dry completely, and use a primer made for the material, masonry primer for concrete or a bonding primer for bare or previously sealed wood.
- Interior wood stairs: Sand glossy or varnished treads to a dull surface, remove the dust, and prime before the first coat. Skipping this step is the most common reason painted stair treads chip.
- Stair risers: Risers get kicked rather than walked on, so a durable satin or semi-gloss wipes clean more easily than a flat finish.
- Treads: Pick a low-sheen finish and consider an anti-slip additive so wet socks don’t slide.
Best Paint for Stair Railings and Banisters
Railings and banisters are touched constantly, so they need a hard, wipeable finish rather than wall paint. A satin or semi-gloss trim enamel works well on interior railings and spindles, applied over a primer that bonds to the existing finish. Sand lightly first, because glossy factory finishes shed new paint if they aren’t dulled.
Painting stairs is detailed work with a lot of cut lines and a long cure time. If you’d rather hand it off, our interior painting team in Westminster, CO paints stair treads, risers, spindles and railings. Request a free estimate or call (720) 263-7210.
Knowing When to Hire a Professional Painter
Look, we understand. Surely a big part of the satisfaction is that you have done a project on your own. But, we have seen many amateur works fail so we know that painting a staircase is a totally different matter. It’s a very busy, very prominent area in your house where mistakes get noticed easily, and the situation might escalate quickly.
So, when should you put down the paintbrush and pick up the phone to call a pro? For most people, it boils down to three things: complexity, condition, and time.
Simple stairs with only a few balusters might be doable by yourself within a long weekend, right? However, if it is not a straight staircase, but a winding one; if the balusters are not simple, but intricate; if the newel posts are not plain, but decorative, then the preparatory work could be so detailed that it might turn into weeks of painstaking work.
Assessing Your Staircase and Your Limits
The condition of the wood is another huge tell. If your treads have deep gouges, a few spindles are wobbly, or you’re seeing signs of moisture damage, a coat of paint is just a band-aid. These are structural issues that need professional-grade repairs, serious wood filling, expert sanding, or even replacing parts of the staircase. Painting over problems like that is a recipe for peeling and chipping down the road.
A professional crew doesn’t just bring brushes and rollers; they bring an entire system built on efficiency. A project that would eat up your next three weekends can often be completed by a seasoned team in just a few days, and the results will be worlds apart. They have the right sanders, the best primers, and access to commercial-grade paint for indoor stairs that you just can’t find at the local hardware store.
The real value a pro brings is foresight. They know how to spot potential problems, like tannin bleed on bare oak or poor adhesion on an old oil-based finish. They’ll use the right primers and techniques to head off those issues before they even start.
The Tangible Benefits of a Professional Job
Hiring a painting service is really an investment in getting the job done right and saving yourself a massive headache. There’s a reason the professional painting industry is so large; the House Painting & Decorating Contractors sector in the U.S. hit a market size of USD 28.2 billion in 2025. That number shows just how much homeowners value a flawless, long-lasting finish.
When you bring in an expert, you’re getting more than just a paint job:
- Guaranteed Quality: A reputable painter nearby stands behind their work. If there’s a problem with the finish, they’ll come back and fix it. You don’t get that kind of safety net when you go the DIY route.
- Flawless Preparation: As we’ve talked about, prep is 90% of the job. Professionals have this down to a science, ensuring every inch is cleaned, sanded, and primed for a bond that lasts for years.
- Safety and Efficiency: Pros know how to work safely and minimize disruption to your home. They’ll get in, get it done right the first time, and get out, so you can get back to your life.
If you can’t decide, our guide to hiring painters for your property presents excellent tips on how to find a trustworthy team. After all, if the idea of dealing with your stairs is too much for you, getting a team like I PAINT STUFF might be the best way to have a stunning, long-lasting result achieve without any worries.
Your Top Questions About Painting Stairs Answered
Painting a staircase is a major renovation and, right, it is a wise move to raise the questions even before the first paintbrush stroke is done. By obtaining the correct responses at the beginning, one can avoid those “I wish I had known that” reflections and ensure that all the hard work is rewarded with a lovely, lasting finish. We at the very least will review some of the frequently asked questions from homeowners.
We want you to feel confident about the job ahead, whether you’re wondering about how long it’ll take, how to handle the fiddly bits, or which paint is really the right one. A great paint job starts with knowing exactly what you’re getting into.
How Long Until I Can Actually Use My Stairs Again?
This is a big one, and it’s all about understanding the difference between “dry” and “cured.” Your paint for indoor stairs might feel dry to the touch in a few hours, but it’s still soft and vulnerable. The real magic happens during the curing process, which is when the paint hardens into a tough, resilient shell.
Here’s a realistic timeline we always recommend to our clients:
- 24-48 Hours: This is the absolute minimum. You can start using the stairs with light traffic, and in socks only. No shoes, no pets, no exceptions.
- 7 Days: After a full week, you can typically resume normal use with shoes. The paint is much harder now, but still be a little mindful.
- 30 Days: Now we’re talking. After a month, the paint is fully cured and has reached its maximum strength against scuffs, dings, and daily wear and tear.
Honestly, rushing this is the number one reason painted stairs fail. A little patience now saves you from a whole lot of touch-up work down the road.
Can I Just Paint Right Over the Carpet on My Stairs?
Let me be blunt: absolutely not. You have to remove everything: the carpet, the old padding underneath, and every last tack strip holding it down. This isn’t just a suggestion; it’s a mandatory first step. Be prepared, because this is often the most grueling part of the whole project.
Once the carpet has been removed, you are likely to come across a rough, sub-floor-grade wood which definitely wasn’t designed for exposure to the daylight. You will have to remove hundreds of staples, fill tiny holes with wood filler, and sand both the stairs and risers thoroughly until they are really smooth. This is quite a big task and honestly, at this stage many DIY enthusiasts simply opt to hire a professional.
The right primer is non-negotiable for achieving a durable, professional-looking finish on your stairs. It’s the true foundation of your paint job.
What’s the Best Way to Paint All Those Tricky Spindles?
When it comes to detailed spindles and balusters, your tools will make or break the experience. Put away the big brushes and rollers; they’ll just create a drippy, sloppy mess. What you need is a high-quality 1-inch to 1.5-inch angled brush. This will give you the control you need to navigate tight corners and follow curved surfaces cleanly.
A mini foam roller may even become your closest companion while you aiming for an ultra-smooth finish on any flat parts of the spindle.
The big trick is to work with thin, even coats and to keep checking for drips all the time. You must immediately catch them before the paint starts to set.
Is porch and floor paint different from regular wall paint?
Yes. Floor and porch paints are formulated to resist abrasion and foot traffic. Wall paint stays softer and scuffs, chips and peels on treads much sooner.
Do I need an anti-slip additive on painted stairs?
It is a good idea on treads, especially in homes with kids, pets or socks on hardwood. A fine grit additive mixed into the final coat adds traction without changing the look much.
Is a Special Primer Really Necessary?
Yes, a thousand times, yes. Using the right primer is the difference between a paint job that lasts for years and one that starts failing in months.
If you’re starting with bare wood, you need an oil-based stain-blocking primer. Wood has natural oils called tannins that can bleed right through latex paint, leaving ugly yellow or brown stains. This type of primer seals them in for good.
What if your stairs already have an old, glossy finish? You absolutely have to sand that shine off first. Once it’s dull and clean, use a dedicated bonding primer. This stuff is formulated to grab onto slick, hard-to-paint surfaces, creating a solid anchor for your new paint. Skipping primer is a gamble you just don’t want to take on a high-traffic area like stairs.
Feeling overwhelmed by the prep work and details? The team at I PAINT STUFF can handle everything from start to finish, delivering a flawless, durable staircase that elevates your home. Get your free, no-obligation estimate today!
