
How to Update Kitchen Cabinets for a Pro-Level Refresh
Looking at your kitchen cabinets and wondering if they are from another era? Well, you are not the only one. That old oak or an old-fashioned finish can make the entire area look tired, but the idea of an entire renovation is enough to scare most people.
The good thing is, you don’t need to demolish everything in order to get a kitchen that you really like.
Most of the time, the fastest and most effective way to bring your kitchen up to date is with a professional painting, or changing the hardware, or better still, a combination of both. These changes can make a big difference visually with a small expense and mess of doing a full renovation.
A Guide to Your Modern Kitchen Cabinet Makeover
If your kitchen feels dated, you’re in the right place. Homeowners across Westminster, Boulder, and nearby Colorado areas want impactful updates without demolition. Fortunately, refreshing your cabinets is easier than you think.
Think of this guide as your practical road map. It gets you through the noise, telling you what actually works. We will find out the top methods of updating your cabinets, changing hardware for a quick facelift, or totally changing the color of the paint. You will be shown the truth about the cost, effort, and real-world results of each method.
Why Smart Updates Are Gaining Popularity
Updating cabinets without replacing them is now more than just a fashion; it is a smarter way to renovate. The attraction is quite clear: think of getting a totally new appearance without the huge cost of a full remodel. Painting, especially, has turned out to be a real revolution.
The numbers don’t lie. Recent industry reports show that over 70% of homeowners now opt to refinish or repaint their kitchen cabinets rather than tear them out. This shift makes perfect sense when you consider that a professional paint job can cost 40-70% less than installing new cabinetry. Plus, with a stellar 113.7% ROI on minor kitchen remodels, it’s one of the best investments you can make in your home. You can dig into more of these 2026 industry statistics on Carolina Renew.
Homeowners in places such as Thornton, Northglenn, and Lafayette, Colorado should consider a cabinet repaint by a professional as it is among the home improvement projects that provide the highest return on investment in these localities. On top of that, if you are looking for exterior painting near you, cabinet refinishing work is a great option that brings a strong impact not only by increasing the value of your house but also by making your use of the space more enjoyable every day.
What This Guide Offers You
Residing in the Front Range area has its own distinct set of factors to think about. This is the reason our guide is based on real tips customized for our local setting, such as ways in which Colorado’s strong sun rays might impact colors and also design trends in homes from Superior to Boulder.
We’ll walk you through everything you need to know:
- How to properly assess your current cabinets to figure out the best path forward.
- A clear comparison of your options: painting, refacing, new hardware, and more.
- An inside look at the professional process required for a durable, factory-smooth finish that lasts.
- Tips for choosing colors and sheens that will look incredible in your Colorado home.
Our goal is to show you why working with a professional painter often provides the best long-term value. A pro job isn’t just about a new color; it’s about a durable, beautiful finish that stands up to daily life and adds real, lasting value to your home. Let’s get started.
First Things First: Assess Your Cabinets and Choose Your Path
If you are about to get lost in the sea of paint swatches and Pinterest boards, then the best first step is to examine your existing kitchen cabinets thoroughly. The condition, the material, the overall structure, and what you have at your disposal would be a major help in deciding your task. Initial evaluation may prevent you from getting into trouble and spending extra money on things you don’t need, whether you are in Westminster or Boulder, Colorado.
Start with a hands-on inspection. Open every door. Pull out every drawer. Are they hanging straight? Do they glide smoothly, or do they stick and sag? Now, look closely at the cabinet boxes themselves. Check for any signs of water damage (especially under the sink), warping, or structural weakness. A little wear and tear is one thing, but widespread problems are a red flag that might mean a simple paint job won’t cut it.
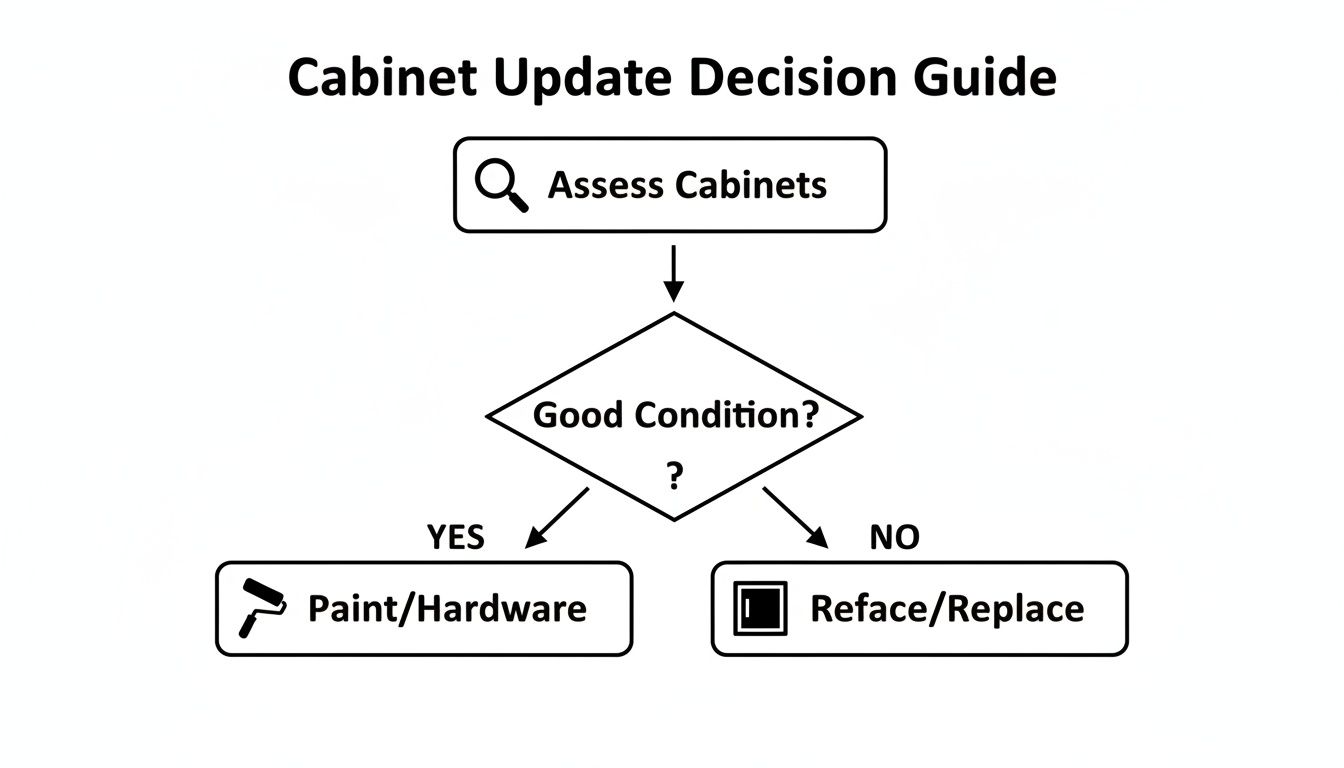
This decision-making guide can help you map out your options based on what you find.
As you can see, a simple cosmetic update like painting could be a great way to solve the problem if the cabinets’ frame is sound. However, if you find that the structural problems are of a larger extent, then it might be a good idea to look at drastic alternatives like refacing or totally replacing.
The kind of material you are working with is a major consideration. Since Thornton and Lafayette, Colorado have a wide variety of homes, we often come across different types of cabinet materials. Each one, of course, requires a slightly different approach.
- Solid Wood or Wood Veneer: These are the gold standard for painting or refinishing. Sturdy woods like oak, maple, and cherry give us a beautiful, durable surface to work with, especially after our meticulous prep work.
- MDF (Medium-Density Fiberboard): Common in newer builds around Superior, Colorado, MDF is smooth and stable, making it a great candidate for paint. Its Achilles’ heel is moisture. You have to be ruthless when checking for any swelling or water damage.
- Laminate or Thermofoil: This is essentially a plastic coating heat-fused over an MDF or particleboard core. Painting them is possible, but it’s a tricky process that demands very specific primers and prep. If that plastic coating is already peeling, bubbling, or cracking, you’ll get a much better and longer-lasting result by refacing or replacing the doors.
We’ve run into situations in Northglenn, Colorado, where a client didn’t notice the subtle peeling on their thermofoil cabinets. Had they painted over it, the paint would have failed within a year. Getting a professional opinion can catch these little things that make a big difference in how well your new finish holds up.
Exploring Your Cabinet Update Options
Having a clear understanding of the state of your kitchen cabinets will allow you to consider various alternatives. Each option will be different in terms of cost, duration, and amount of work involved. Getting familiar with them is essential in order to decide without any doubts. This article about selecting kitchen cabinets can also be very helpful in recognizing different styles and types of materials.
Here’s a quick comparison of the main approaches.
Comparing Kitchen Cabinet Update Methods
|
Update Method |
Typical Cost |
Project Timeline |
DIY Skill Level |
Best For |
|
Hardware Swap |
$100 – $500 |
1 – 2 hours |
Beginner |
A quick, budget-friendly refresh or for renters. |
|
Painting |
$2,000 – $7,000+ |
3 – 7 days |
Intermediate to Advanced |
Structurally sound cabinets where a color change is the main goal. |
|
Refacing |
$5,000 – $12,000+ |
3 – 5 days |
Advanced |
A good layout but you want a new door style or have damaged doors. |
|
Replacement |
$8,000 – $25,000+ |
1 – 3 weeks+ |
Pro Recommended |
Poor layout, major damage, or a complete kitchen overhaul. |
As the table shows, there’s a solution for nearly every budget and goal. Let’s break down what each of these really means for your project.
The Quick Refresh: A Hardware Swap
This is your speediest and most economical solution. You might not believe how a small change like replacing old, bulky door features with new matte black handles or warm, brushed brass knobs transforms the whole space. It is an ideal task for a lazy Saturday.
The High-Impact Transformation: Professional Painting
When your cabinet boxes and doors are in solid shape, nothing delivers a bigger “wow” factor for the money than a professional paint job. This is where you get to introduce a whole new color and personality to your kitchen. The key to a durable, factory-like finish isn’t just the paint; it’s the 90% prep work that comes before it. You can see the level of detail involved in our guide on how to prep cabinets for a pro paint job.
The Hybrid Approach: Refacing
Consider refacing as a huge transformation of your kitchen without changing the layout. You only keep the cabinet boxes while getting brand new doors and drawer fronts. We finish off by covering the exposed parts of the boxes with matching real wood veneer or laminate. This is a perfect remedy when your kitchen plan is fine, but the doors are worn out, or you want a change of style, e.g., traditional arched doors to modern, clean Shaker.
The Complete Overhaul: Full Replacement
At times, you need to go back to the drawing board. A total refurnishing is your best long-term investment, especially if your cupboards are breaking you up, the design is difficult and inefficient, or they are just cheap builder-grade boxes that have been around for a while. Besides being the most overstaffed and costly one, it also allows you to have the liberty to come up with the kitchen of your dreams.
A Look Inside Our Professional Cabinet Painting Process

Spotting a flawlessly smooth, factory finish on a cabinet ain’t just about the paint itself. Actually, the real trick or magic, the secret behind a durable finish, is how the prep work is done.
We do a detailed, multi-step method, which we have refined year after year, and this is exactly what distinguishes a professional job from a DIY one that starts chipping and peeling after just a few months
We want homeowners from Northglenn to Superior, Colorado, to understand exactly what goes into a high-quality finish. Knowing the process helps you spot quality work and appreciate why skipping a single step just isn’t an option.
The Critical First Steps On-Site
Everything starts in your kitchen. We begin by carefully removing every single cabinet door and drawer front. Each one is labeled with a system that guarantees it returns to its exact original spot. It might seem like a small thing, but it’s crucial for ensuring a seamless fit when we reassemble everything.
Then, it is time to prepare your kitchen for the “surgery”. At top of the line we thoroughly cover the entire kitchen with the masking materials; all the way to floor, countertops, backsplash, and appliances are all sealed with paper and plastic. Besides that, we set up a complete containment system that blocks off the kitchen from the rest of your house. For our clients in places like Lafayette or Thornton, Colorado, this means you can go about your day without fine dust settling everywhere.
Degrease, Sand, and Clean Again
Years of cooking create an invisible film of grease and grime on cabinets. Paint simply will not stick to it. That’s why the next phase is an intensive degreasing of every square inch of the cabinet boxes, doors, and drawers.
We use professional-grade degreasers that cut through buildup that household cleaners can’t touch. Honestly, this is often the most time-consuming part of the job, but it’s non-negotiable for long-term adhesion.
Once we are done with the deep cleaning of the areas, we proceed with sanding the surfaces. Sanding is mainly done for two reasons: firstly, it will help to level out small dents and other blemishes, and secondly, the most important reason: it makes the surface rough so that the primer has something to grab on to. Indeed, painting a very smooth surface will most probably mean the paint will flake off later on. After sanding, we clean the surface very thoroughly one more time to ensure it is absolutely dust-free.
The Power of Professional Priming
With a perfectly clean and scuffed surface, it’s time to prime. A quality primer is the unsung hero of a cabinet paint job, and it’s something homeowners in Boulder and Westminster, Colorado, should always ask about.
- Blocks Stains: Woods like oak contain tannins, which can bleed through paint, leaving ugly yellow or brown stains. A good shellac-based primer locks those tannins in.
- Ensures Adhesion: Primer is the ultimate bonding agent, creating a rock-solid link between the wood and the topcoat of paint.
- Creates True Color: It provides a neutral, uniform base so the beautiful color you picked looks exactly as it should, without the old wood tone showing through.
The Two-Part Painting System
This is where our process really sets itself apart. We treat the cabinet boxes and the doors/drawers differently to achieve the best possible result.
- On-Site Box Painting: The cabinet frames (or boxes) are carefully brushed and rolled right in your kitchen. This hands-on method gives us precise control in tight corners and ensures a perfect, full-coverage finish without getting overspray on your appliances or walls.
- Off-Site Spray Finishing: We transport all the doors and drawer fronts to our shop. Here, in a controlled, dust-free environment, we spray-apply multiple coats of primer and our premium cabinet coating. This is the only way to get that flawless, glass-smooth finish with zero brush or roller marks.
This combination approach reduces home disruption significantly while jointly ensuring a beautiful and resilient surface simply on the visible and tangible components that you deal with on a daily basis. If you want to see the effects of this method in your space, don’t hesitate to remodel your kitchen cabinets with our painting services and take a look at our project gallery.
Once the finish has fully cured to maximum hardness, we bring everything back for reinstallation. We carefully rehang every door, install each drawer, and put on all the hardware, making precise adjustments until the alignment is perfect. The result is a kitchen that doesn’t just look new; it’s built on a foundation of expert preparation.
Choosing the Right Colors and Finishes for Your Colorado Home

Picking a new color for your kitchen cabinets should be the best part of the project, but for many homeowners, it’s where the decision paralysis kicks in. This is especially true for homes here along the Front Range. The intense, high-altitude sunlight we get in places like Westminster and Boulder, Colorado, can completely transform how a color looks on your cabinets compared to a tiny paint chip.
We’ve seen it countless times. A gray that seemed perfectly neutral online suddenly throws off strong blue or purple undertones in the bright morning light of a Superior, Colorado kitchen. That warm, creamy white you loved in the showroom might look way too yellow once the afternoon sun hits your home in Lafayette.
The most common and major error that we witness is picking a color from a picture or even worse, under the scary fluorescent lights of a hardware store. The only thing that really counts is the natural light of your home and it’s quite unique. Be sure to paint a pretty big sample board and change its position in the kitchen during the day in order to see how the color goes with your counters, backsplash, and floors.
Current Trends We’re Seeing in Local Kitchens
Of course, a timeless white is a safe bet, but the residents of Northglenn and Thornton, Colorado, are spicing up their lives with more vibrant and daring colors. One way to enlighten yourself about the new arrivals is to go through the most trendy kitchen cabinet colors, and that can also be a highly motivating factor.
Based on the projects we’re completing right now, here are a few palettes that really resonate with the Colorado lifestyle:
- Earthy Greens: Sage, moss, and olive bring the outside in, connecting your kitchen to the natural beauty just beyond the window.
- Deep Blues and Charcoals: For a touch of drama and sophistication, navy and dark gray create a modern anchor in the room. They pair beautifully with both warm wood accents and cool-toned metals.
- Warmer Whites: There’s a definite shift away from stark, clinical whites. Creamier, softer shades create an inviting atmosphere that feels both clean and cozy.
- Two-Tone Designs: A fantastic way to show some personality. We often paint upper cabinets a lighter color to keep the space feeling open, with a darker, grounding color on the lowers for depth and interest.
Don’t Forget the Finish
Color is where eyes are drawn first, but the major of the finish you choose is just as important for not only getting the look you want but also having the surface endure over time. With kitchen cabinets, the finish provides a protective cover for your beautiful new color against the wear and tear that occurs in an active kitchen.
- Satin Finish: Our go-to recommendation for 90% of projects. It offers a soft, subtle luster that’s incredibly durable and easy to clean without being overly shiny. It’s also very forgiving, hiding minor surface imperfections well.
- Semi-Gloss Finish: If you need maximum durability, think homes with young kids or rambunctious pets; semi-gloss is an excellent choice. It reflects more light and wipes down exceptionally easily, making it perfect for high-traffic kitchens.
We almost always steer clients away from matte or flat cabinet finishes. While the velvety look is appealing, these sheens tend to attract dirt and are very difficult to clean without “burnishing,” creating shiny spots on the surface.
If you’re not settled on a color yet, you might want to check out our article on kitchen cabinet paint colors that can give your space a whole new look in an instant. The secret to a fabulous kitchen that stands the test of time is choosing the right color and finish.
Why Hiring a Pro Painter Is a Smart Investment
We get it. According to a local painting contractor, the idea of tackling your kitchen cabinets yourself is tempting. It looks like a great way to save a few bucks and completely change your kitchen’s vibe over a weekend. The reality, as many homeowners from Westminster to Lafayette, Colorado, have learned the hard way, is that it’s often a shortcut to a whole lot of frustration.
When a DIY job goes wrong, it not only appears unappealing but also results in higher expenses for the repair than if a professional had been hired from the start. We have seen in homes in Boulder and Northglenn, Colorado, exposed paint flaking, visually disturbing brush strokes, and still sticky cabinet doors after several weeks. That kind of repair demands beginning afresh: thorough, expert removal and repainting.
That’s why you should think of hiring professional cabinet painting companies nearby as an investment in your home, not just another expense.
More Than Just a Can of Paint: The Real DIY Cost
That first visit to a hardware store looks cheap, right? Just a couple of paint cans and a few brushes… what’s the problem? Speaking of which, a beautiful, lasting finish needs a lot more than that stuff, and very soon you are faced with quite a big budget.
Here’s what a true professional-grade job actually involves:
- The Right Tools: You can’t get that flawless, factory-like spray finish with a roller. Professionals use specialized equipment like high-volume, low-pressure (HVLP) sprayers, which are a serious investment to buy or even rent.
- The Right Materials: This isn’t the time for regular wall paint. We use high-performance cabinet coatings designed for heavy use, along with specific bonding primers, powerful degreasers, and the right sandpaper grits. It’s a long and specific shopping list.
- The Value of Your Time: This is the big one. A proper cabinet job is incredibly labor-intensive. In fact, 80-90% of the work is in the prep. That’s all the cleaning, sanding, and priming that has to happen before a single drop of color is applied.
A professional crew serving Superior or Westminster, Colorado, can typically wrap up a project in 3-5 days. For a homeowner working nights and weekends, that same job can easily drag on for weeks, leaving your kitchen completely torn apart.
The Difference Is in the Details (and the Experience)
When you bring in a pro, you’re not just paying for their tools; you’re getting years of hard-won experience. That expertise is the key to figuring out how to update kitchen cabinets so they last.
A seasoned painter nearby knows exactly how to handle the specific challenges your cabinets present. They’ve seen it all, from preventing tannin bleed-through on the oak cabinets common in older Boulder, Colorado homes to properly priming the slick thermofoil surfaces you find in newer builds. This kind of knowledge is what stops a paint job from chipping, peeling, or failing in a year or two.
In addition, we also provide what you cannot do at home: a controlled environment. We move the doors and drawer fronts to a specialized spray booth to finish a perfect, dust-free coating. This stage is indispensable to obtain the smooth, durable surface which will not only look but also feel as if it has come straight from a showroom. What you get from a local painting company near you can really bring out this difference in quality and process.
The Guarantee of a Job Done Right
At the end of the day, hiring a professional is about one thing: peace of mind. It’s the confidence that comes from knowing the job will be done correctly, finished on time, and look absolutely fantastic, without you lifting a finger.
You get to skip the DIY stress; the worry about ruining expensive cabinets, the disappointment of a finish that just looks… off, and the dread of a project that never seems to end. It’s a smart move that directly increases your home’s value and your enjoyment of its most important room.
Your Cabinet Update Questions Answered
Thinking of remodeling your kitchen cabinets? You may have some questions in your mind. Since we paint in homes of Westminster, Boulder, and the Front Range regularly, we hear these questions over and over. So here are a few direct and honest responses to the questions you might have based on things other homeowners have asked us.
How Long Does Professional Cabinet Painting Take?
We understand how difficult it can be for you when your kitchen is out of order, and that’s the reason we make every effort to complete the job quickly. As a rule, a kitchen remodel in Lafayette or Thornton, Colorado, takes us 3 to 5 days from beginning to end in most cases. Over the years, we have perfected our method so as to interrupt you the least while still upholding our high standards.
Here’s a look at what that week generally involves:
Day 1 is all about prep. Our team comes to your home to mask off your countertops, backsplash, and appliances. We then remove all the doors and drawer fronts to take back to our shop, and we begin cleaning and sanding your cabinet boxes right there in the kitchen.
For the next 2-3 days, we will work on two fronts. The cabinet boxes are carefully prepped and painted in your home, while your doors and drawers get the star treatment in our controlled spray shop. This is how we achieve that perfectly smooth, factory-like finish that’s just not possible on-site.
On the final day, we bring everything back for the big reveal. We’ll meticulously reinstall every door and drawer, install your hardware, and do a final walkthrough with you to make sure every detail is perfect.
Is It Better to Paint or Reface My Cabinets?
This is a fantastic question, and the answer really comes down to the bones of your existing cabinets and what you’re trying to achieve.
Painting is, without a doubt, the best option if your cabinet boxes and doors are in good physical shape. If you like the style of your doors but just hate the color or finish, painting gives you a dramatic transformation for a fraction of the cost. For most homeowners in Northglenn and Superior, Colorado, it delivers the biggest bang for your buck.
Refacing is a smart choice if your cabinet doors are damaged or warped, or if you just can’t face looking at their outdated style any longer (think ’90s arch). When you refinish, we don’t take out the cabinet boxes; rather, we put a new veneer on them and fit new doors and drawer fronts. Refacing costs a bit more than painting. However, in return, it is still far less expensive than removing everything and installing new ones from scratch.
What Is the Most Durable Paint Finish for Cabinets?
In the kitchen, durability plays a major role. Your finish must be able to deal with stains, fingerprints, and constant cleaning. Generally speaking, a top-notch satin or semi-gloss finish is a reliable choice. They provide the right combination of an attractive appearance along with very good washability. In case you want to explore more, it is beneficial toin know the kind of paint to use on cabinets in order to obtain a finish that endures.
Here’s how the two most popular sheens stack up:
|
Finish Type |
Appearance |
Durability & Cleanability |
Best For |
|
Satin |
A soft, low-sheen glow |
Very durable and easy to wipe |
The go-to for most kitchens. Hides fingerprints well. |
|
Semi-Gloss |
A noticeable, sleek shine |
Extremely tough and scrubbable |
High-traffic homes, especially with kids or pets. |
We don’t use standard wall paint. Our company utilizes industrial-strength cabinet finishing that hardens and forms a non-porous outer layer. These coatings are specially formulated to endure the continual use and abuse in a commercial kitchen and be resistant to the powerful UV exposure in Bucket-area residential properties.
Will Professionally Painted Cabinets Chip or Peel?
When done correctly, absolutely not. A professional paint job should be incredibly resilient and withstand normal, everyday use without chipping or peeling. The secret isn’t in the final coat of paint; it’s in the prep work, which honestly makes up about 90% of the job.
This is where a pro’s experience really shows. We follow a meticulous process to ensure paint bonds permanently.
- Deep Cleaning: We start by removing all the invisible grease and grime that builds up in a kitchen. If you skip this, paint failure is guaranteed.
- Proper Sanding: Every square inch of the surface is scuffed. This creates a microscopic “tooth” for the primer to grab onto for a tenacious hold.
- Bonding Primer: We use a high-adhesion primer that acts like double-sided tape, bonding to the cabinet surface below and creating a perfect foundation for the paint above.
Think of it this way: a factory finish can still chip if you hit it hard enough with a frying pan. The same is true for a professionally painted finish. But for the bumps, scuffs, and cleanups of daily life, our system is built to last.
Ready to see how a professional paint job can transform your kitchen? At I PAINT STUFF, we bring expert craftsmanship and premium materials to homes across Westminster, Thornton, Northglenn, Lafayette, Superior, Boulder, and the entire Front Range. Get your fast, free, and honest estimate today by visiting us at https://yourpaintingpro.com.
